ECLER eHMA60
PRICE ON ENQUIRY
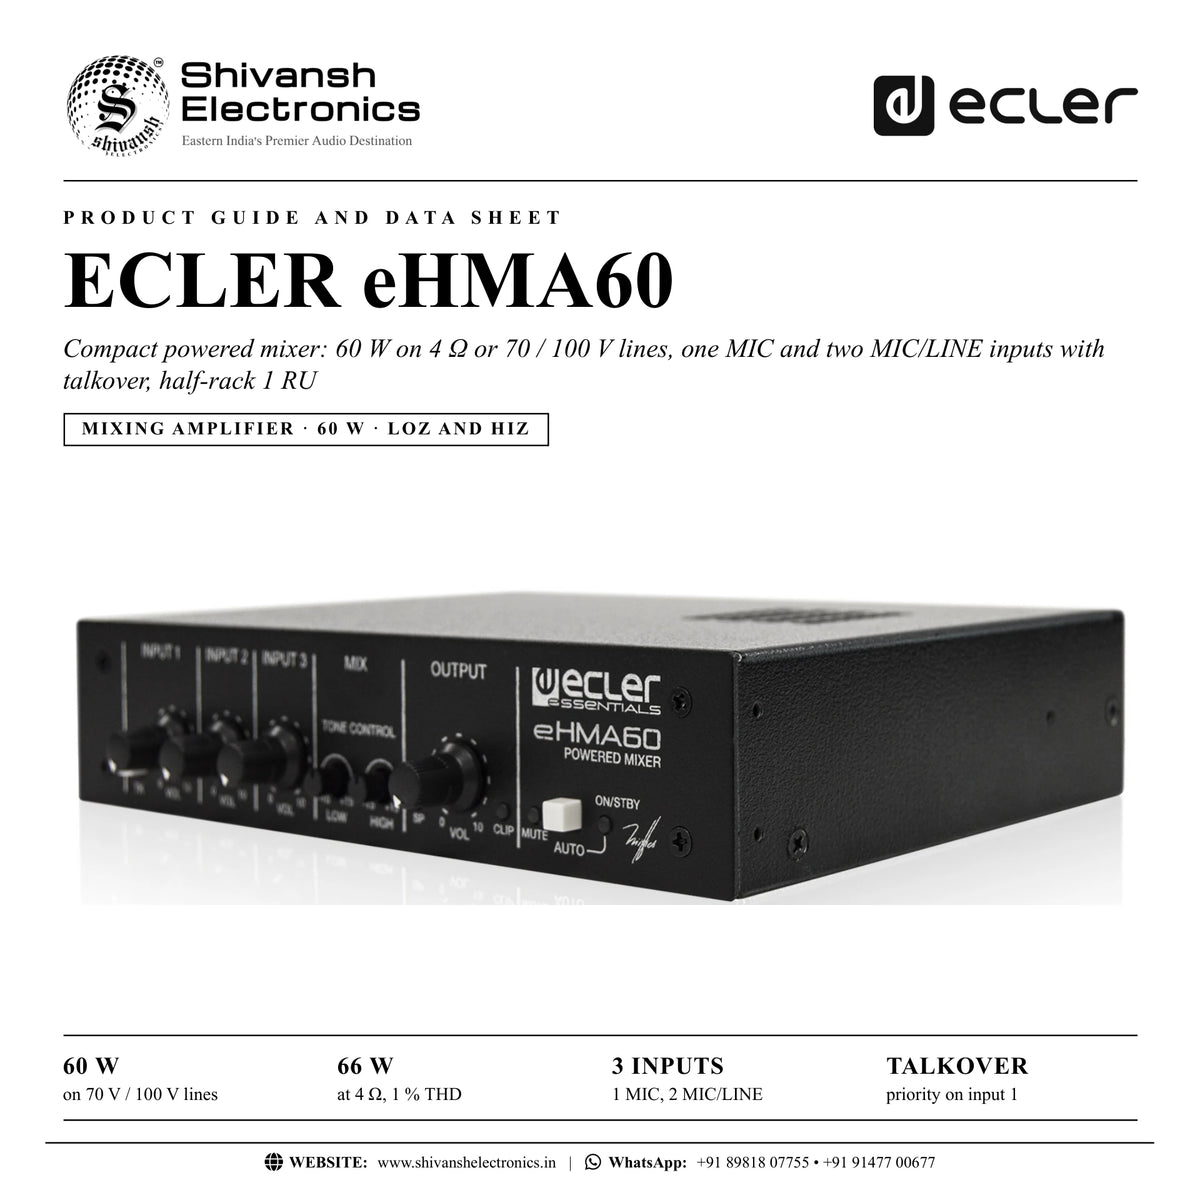
ECLER eHMA60 powered mixer: 60 W on 4 Ω or 70/100 V lines, 1 MIC and 2 MIC/LINE inputs, talkover, tone control, MUTE port, auto standby. Available in India from Shivansh Electronics, Kolkata, West Bengal, India.
VISUAL GUIDE — See Every Photo, Spec & Setup Step (PDF)
PRICE ON ENQUIRY. For the price, exclusive offers, delivery timelines, or any other information, please DM us or call +91 89818 07755 / +91 91477 00677. We will gladly share a personalised quotation for Shivansh Electronics, Kolkata, West Bengal, India. All payments are processed securely through Razorpay, our trusted payment gateway partner.
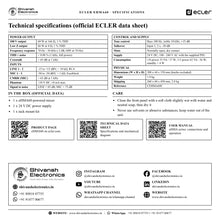
Power output
| 100 V output | 60 W at 166 Ω, 1 % THD |
| Low Z output | 66 W at 4 Ω, 1 % THD |
| Frequency response | 70 Hz - 30 kHz (-3 dB, HPF at 70 Hz) |
| THD + noise | < 0.08 % |
| Crosstalk | > 65 dB at 1 kHz |
Inputs
| LINE 1 - 2 | -15 to +15 dBV, > 10 kΩ, double RCA |
| MIC 1 - 3 | -50 to -20 dBV, > 1 kΩ, balanced Euroblock |
| CMRR (MIC) | > 65 dB at 1 kHz |
| Phantom | +24 V DC, 10 mA max. |
| Signal to noise | LINE > 85 dB; MIC > 75 dB |
Control and supply
| Tone control | Bass 100 Hz, treble 10 kHz, ±15 dB |
| Talkover | Input 1; 2 s, -30 dB |
| Mute | Normally open, dry contact |
| Supply | 24 V DC; 100 - 240 V AC with the supplied PSU |
| Consumption | 1/8 power 33 VA / 17 W; 1/3 power 62 VA / 36 W; standby < 4 W |
Physical
| Dimensions (W x H x D) | 200 x 44 x 150 mm (knobs excluded) |
| Weight | 1.9 kg |
| Shipping dimensions | 260 x 60 x 450 mm |
| Shipping weight | 2.8 kg |
| Reference | CEHMA60C |
Product overview
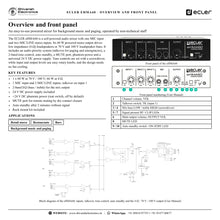
The ECLER eHMA60 is a compact self-powered audio mixer with one MIC input and two MIC/LINE stereo inputs, and a 60 W mono output for 4 Ω loudspeakers or 70 V / 100 V lines.
It includes talkover on input 1 for paging and emergencies, a 2-band tone control for the mix, auto standby, a MUTE port, +24 V phantom power and a universal 24 V DC power supply. Input and output levels use rotary knobs while tone controls are set with a screwdriver, so non-technical staff can run it safely, and it needs no fan. The half-width unit comes with a rack mount kit for 19 inch racks.
| 70 V / 100 V output | 60 W |
| At 4 Ω | 66 W |
| Inputs | 3 |
| Standby consumption | < 4 W |
Key features
- 1 x 60 W at 70 V / 100 V; 66 W at 4 Ω
- 1 MIC input and 2 MIC/LINE inputs
- Talkover on input 1, -30 dB
- 2-band EQ (bass / treble) for the mix
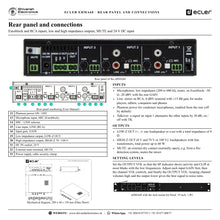
- +24 V DC phantom power (rear switch)
- MUTE port for dry contact closure
- Auto standby function
- 24 V DC power supply and rack mount kit included
Background music and paging
Microphones (200 to 600 Ω) connect on Euroblock, line sources on RCA, each with a rear GAIN control. Talkover on input 1 attenuates the music by 30 dB while an announcement is made.
Low or high impedance
Use LOW-Z OUT for 4 Ω loudspeakers, or the HIGH-Z terminals (0 V and 70 V or 100 V) for loudspeakers with line transformers up to 60 W in total.
Safe operation
A dry contact on MUTE silences the mixer from a fire detection system, and auto standby lowers consumption to under 4 W after 2 minutes without signal.
In the box
- 1 x eHMA60 powered mixer
- 1 x 24 V DC power supply
- 1 x rack mount kit
ECLER eHMA60: frequently asked questions
Can it drive 100 V ceiling loudspeakers?
Yes. The HIGH-Z output works on 70 V or 100 V lines up to 60 W in total.
Does it support condenser microphones?
Yes. +24 V DC phantom power is switched on from the rear panel.
Can it be rack mounted?
Yes. A rack mount kit is included for 19 inch racks (1 RU).
Can a fire alarm mute it?
Yes. The MUTE port accepts a normally open dry contact.
Where can I buy the ECLER eHMA60 in India?
The ECLER eHMA60 is available from Shivansh Electronics, Kolkata, West Bengal, India, with delivery across India.
Workflow 1: Shop background music with announcements
Retail stores with ceiling loudspeakers.
Connections
| Connect | To |
|---|---|
| Music player | LINE input (RCA) |
| Paging microphone | MIC input with talkover |
| HIGH‑Z OUT 100 V | Ceiling loudspeaker line |
Setup
- Connect the 100 V loudspeaker line to 0 V and 100 V.
- Set the microphone input GAIN.
- Switch on TK for the microphone input.
- Set OUTPUT VOL so CLIP only blinks on the low frequencies.
Tip: Talkover lowers the music by 30 dB during announcements.
Workflow 2: Restaurant and bar
Dining areas with background music and a host microphone.
Connections
| Connect | To |
|---|---|
| Media player or tablet | LINE input |
| Loudspeakers | HIGH‑Z OUT 70 V or 100 V, or LOW‑Z OUT |
Setup
- Connect the loudspeakers to the matching output.
- Set the bass and treble with a screwdriver.
- Set channel VOL high and OUTPUT VOL to the room level.
Tip: Screwdriver tone controls keep staff from changing the sound by accident.
Workflow 3: Fire alarm muting
Installations that must fall silent on an alarm.
Connections
| Connect | To |
|---|---|
| Fire panel relay (dry contact) | MUTE terminal |
Setup
- Wire the normally open contact to MUTE.
- Trigger a test alarm.
- Check that the MUTE LED lights.
Tip: The MUTE input works with a normally open dry contact.
Workflow 4: Low impedance loudspeakers
Small rooms with a few 4 Ω loudspeakers.
Connections
| Connect | To |
|---|---|
| Loudspeakers, total 4 Ω | LOW‑Z OUT (+, -) |
Setup
- Match the total load to 4 Ω.
- Connect with correct polarity.
- Set the output level.
Tip: Do not use the high and low impedance outputs at the same time.
Workflow 5: Two areas on one line
Sites that switch loudspeaker lines on and off by area.
Connections
| Connect | To |
|---|---|
| Zone loudspeaker lines | HIGH‑Z zone outputs |
Setup
- Connect each area to its own zone output.
- Use the front ZONE switches to turn areas on or off.
- Set OUTPUT VOL for the whole system.
Tip: Total power of all zones must not exceed the rated output.
Workflow 6: Energy saving
Venues where the system is often idle.
Connections
| Connect | To |
|---|---|
| Front AUTO switch | Auto standby on |
Setup
- Press the AUTO switch.
- With no input signal the unit enters standby.
- It returns to normal operation as soon as a signal appears.
Tip: Standby consumption is only a few watts.